
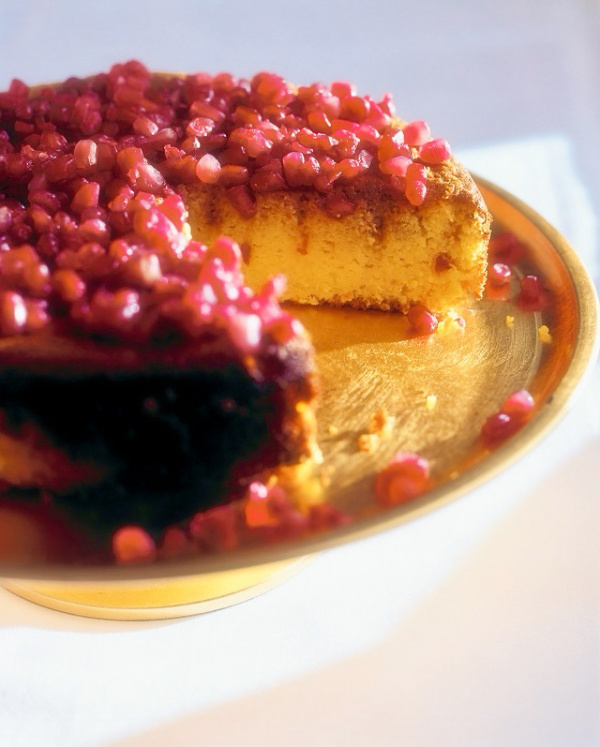
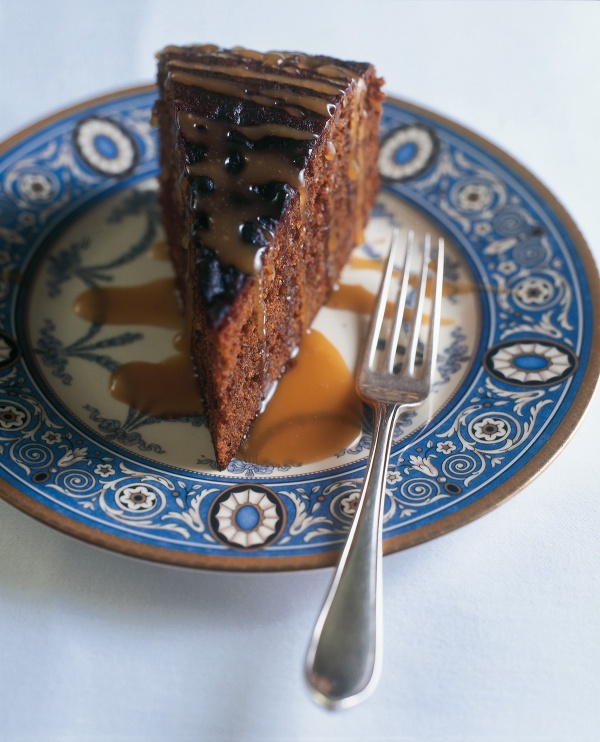
Honey Cake with Dates and Apples
by NigellaIntroduction
It is true that I already have a Honey Cake recipe, and one that has been dear to me for many years, but I felt it was time to branch out. I had come to terms with the fact that my earlier Honey Cake doesn’t have actually any honey in it (it requires, instead, the glory that is Golden Syrup) but I also had to conclude that perhaps having a Honey Cake — whose purpose in life is after all to celebrate Rosh Hashanah, the Jewish new year — that can’t be eaten by those who keep Kosher, is not the most helpful thing in the world.
Last year, I decided to set that right, and this Honey Cake with Dates and Apples is the delicious remedy. Essentially, whatever the ingredients, what matters is that the cake be sweet: a symbolic expression of most urgent hopes for a sweet year ahead. Actually, since there is no mention of bee-keeping in the Bible, is has long been presumed that ‘honey’, as in Land of Milk and Honey, actually refers to a syrup made with boiled-down dates, which feature still in the Sephardi New Year feast. And in the Ashkenazi tradition, eating slices of apple dipped in honey is an essential part of the Rosh Hashanah celebration. It pleased me to bring these components together. They also help, along with the dark muscovado sugar, to create a cake of seductive squidginess. I have forgone the familiar warm (if noisy) gingerbready spicing to let the flavours of honey, apple and date sing out beautifully and clearly, helped along the way by the fragrance of orange and orange blossom. If needed, you could always replace the orange blossom water with another teaspoon of orange juice.
I use a pleated paper cake tin liner when making this, which helps with getting the cake out of the tin, and makes washing up easier too. It’s especially useful if you’re giving a cake away as a present. But otherwise, do line the bottom of the tin with parchment and lightly oil the sides. If you’re making this to eat at home, I should tell you that I rather adore it still slightly warm.

Ingredients
Yields: 12 slender or 8 chunky slices
- 75 grams finely chopped dates
- 325 - 350 grams Braeburn apples (chopped into small – about 1cm / ½ inch - pieces)
- 1 large orange
- 125 millilitres regular olive oil plus 1 tablespoon more, plus extra for greasing
- 150 grams honey plus 50g/ 3 tablespoons more for glaze
- 100 grams dark muscovado sugar
- 2 large eggs
- 1 teaspoon orange blossom water
- 200 grams plain flour
- 50 grams ground almonds
- 1 teaspoon cocoa
- ¼ teaspoon salt
- 100 grams walnut halves
- 1½ teaspoons bicarbonate of soda
- 1½ teaspoons hot water
- generous ½ cup finely chopped dates
- 2¼ cups Braeburn or Honeycrisp or Gala apples (chopped into small – about 1cm / ½ inch - pieces)
- 1 large orange
- ½ cup regular olive oil plus 1 tablespoon more, plus extra for greasing
- ½ cup honey plus 50g/ 3 tablespoons more for glaze
- ½ cup dark brown sugar
- 2 large eggs
- 1 teaspoon orange blossom water
- 1⅔ cups all-purpose flour
- ½ cup almond meal
- 1 teaspoon unsweetened cocoa
- ¼ teaspoon salt
- 1¼ cups walnut halves
- 1½ teaspoons baking soda
- 1½ teaspoons hot water
Method
- Drop a paper liner into a 20cm/ 8 inch Springform tin, or line the base with parchment and lightly oil the sides. Get out a medium-small heavy based saucepan that comes with a tightly fitting lid. I use one 18cm in diameter, and I wouldn’t advise going much wider.
- Finely chop the dates, and set aside for now. Peel, quarter and core the apples, then cut them into small pieces, about 1cm/ ½ inch, and drop them into your saucepan. Finely grate the zest of the orange into the pan, add 3 tablespoons of juice, followed by the 1 tablespoon of olive oil. Cover the pan, and cook over medium-low heat (lifting the lid to give the occasional stir) for 7 minutes, by which time the apples should be almost cooked through. Add the chopped dates and a further tablespoon of orange juice, give a good stir, and then cook without the lid, stirring and pressing down on the apples, for 3 minutes or until you can mash the apples and dates to a rough puree with a fork.
- Take the pan off the heat and leave for 10 minutes, during which time you can heat the oven to 180ºC/160ºC Fan/350ºF and measure out all your other ingredients.
- So, pour the oil in a wide-necked measuring jug, followed by the honey, dark muscovado sugar, eggs and orange blossom water. Whisk to mix just with a fork; you don’t want to make this very aerated.
- Measure the flour in a bowl, and stir in the ground almonds, cocoa and salt. With the walnuts in another bowl, use your fingers to break them up well. I find this better than chopping them as it’s easier to end up with nubbly pieces rather than a lot of splinters and dust, too.
- Pour the jug of liquid ingredients into the pan, and mix to combine with the fruit. Make sure you scrape out every last bit from the jug.
- Now tip in the dry ingredients and just stir until you see no trace of flour — you don’t have to beat madly; indeed, in a smallish pan, it wouldn’t be wise — followed by the crumbled walnuts. Finally, spoon 1½ teaspoons bicarbonate of soda into a little cup, fill another little cup with hot water, then add 1½ teaspoons hot water to the bicarb — it will fizz up gently — then promptly tip and scrape the bicarbonate of soda paste into the bronzy-buff-coloured batter in the pan, and stir well to incorporate.
- Scrape the batter into your prepared tin, and bake for 45-50 mins, or until the cake risen and a deep dark brown on top, and a cake tester will come out clean apart from a few damp crumbs. While the cake is still very good to eat (I actually prefer it) when the top is still slightly soft, it will sink a little on cooling, so make sure the top feels firm on the surface if you want to avoid this. But don’t worry about any cracks, please!
- Put the cake in its tin on a wire rack. Stir the 50g/ 3 tablespoons honey with 1 teaspoon orange juice just so it is a little more fluid, and brush about a half of it over the hot cake. Leave for 10 minutes and then brush on the rest, then leave the burnished cake there to cool in the tin.
- Drop a paper liner into a 20cm/ 8 inch Springform tin, or line the base with parchment and lightly oil the sides. Get out a medium-small heavy based saucepan that comes with a tightly fitting lid. I use one 18cm in diameter, and I wouldn’t advise going much wider.
- Finely chop the dates, and set aside for now. Peel, quarter and core the apples, then cut them into small pieces, about 1cm/ ½ inch, and drop them into your saucepan. Finely grate the zest of the orange into the pan, add 3 tablespoons of juice, followed by the 1 tablespoon of olive oil. Cover the pan, and cook over medium-low heat (lifting the lid to give the occasional stir) for 7 minutes, by which time the apples should be almost cooked through. Add the chopped dates and a further tablespoon of orange juice, give a good stir, and then cook without the lid, stirring and pressing down on the apples, for 3 minutes or until you can mash the apples and dates to a rough puree with a fork.
- Take the pan off the heat and leave for 10 minutes, during which time you can heat the oven to 180ºC/160ºC Fan/350ºF and measure out all your other ingredients.
- So, pour the oil in a wide-necked measuring jug, followed by the honey, dark brown sugar, eggs and orange blossom water. Whisk to mix just with a fork; you don’t want to make this very aerated.
- Measure the flour in a bowl, and stir in the almond meal, unsweetened cocoa and salt. With the walnuts in another bowl, use your fingers to break them up well. I find this better than chopping them as it’s easier to end up with nubbly pieces rather than a lot of splinters and dust, too.
- Pour the jug of liquid ingredients into the pan, and mix to combine with the fruit. Make sure you scrape out every last bit from the jug.
- Now tip in the dry ingredients and just stir until you see no trace of flour — you don’t have to beat madly; indeed, in a smallish pan, it wouldn’t be wise — followed by the crumbled walnuts. Finally, spoon 1½ teaspoons baking soda into a little cup, fill another little cup with hot water, then add 1½ teaspoons hot water to the bicarb — it will fizz up gently — then promptly tip and scrape the baking soda paste into the bronzy-buff-coloured batter in the pan, and stir well to incorporate.
- Scrape the batter into your prepared tin, and bake for 45-50 mins, or until the cake risen and a deep dark brown on top, and a cake tester will come out clean apart from a few damp crumbs. While the cake is still very good to eat (I actually prefer it) when the top is still slightly soft, it will sink a little on cooling, so make sure the top feels firm on the surface if you want to avoid this. But don’t worry about any cracks, please!
- Put the cake in its tin on a wire rack. Stir the 50g/ 3 tablespoons honey with 1 teaspoon orange juice just so it is a little more fluid, and brush about a half of it over the hot cake. Leave for 10 minutes and then brush on the rest, then leave the burnished cake there to cool in the tin.
Additional Information
STORE:
Store the cake in an airtight container, or tightly wrapped in food wrap, in a cool place for up to 1 week.
FREEZE:
Can be frozen, wrapped in a double layer of food wrap and a layer of foil for up to 3 months. To thaw, unwrap and put on a wire rack at room temperature for 3-4 hours. Individual slices can be frozen wrapped in food wrap and put in an airtight container for up to 1 month.


Tell us what you think
Thank you {% member.data['first-name'] %}.
Explore more recipesYour comment has been submitted.
What 2 Others have said
-
Posted by hlrude on 13th October 2024
-
Posted by jacsi on 2nd October 2024
Show more commentsThis was moist and delicious…
can’t wait to try this!