
Coxinha
by NigellaIntroduction
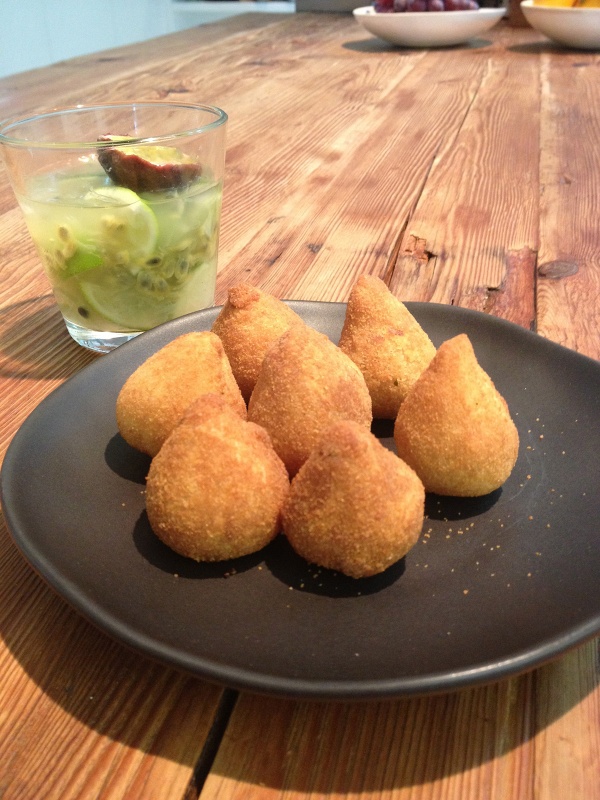
Although a regular coxinha is more the size and shape of a bulbous, dumpy pear, these are mini versions, like fat little figs, and you can get a fabulous 70 of these emblematically Brazilian chicken croquettes out of not much more than three small chicken breasts (although I feel I should have used 6 chicken thigh fillets instead, given the name of this dish) and a great deal of flour. Yes, they are time-consuming to make, but if you get a bunch of friends together and get a little conveyer belt going, it is enormously companionable.
I have given measurements below, but I find it easier to think in terms of ratios: in other words, for each cup of chopped cooked chicken, you will need a cup of flour and a cup of liquid. By the way, I find a small chicken breast fillet yields one cup of chopped meat.
I ate many of these when I was in Brazil, and I'm very grateful to my Brazilian friend and great cook over here, Helio Fenerich, who showed me how they're made. Incidentally, he says that in Brazil these are commonly made and then frozen and then dipped in egg and breadcrumbs and deep fried from frozen.
Ingredients
Makes: about 70 coxinhas
To Make the Coxinhas
- 3 chicken breast fillets
- 1 litre chicken stock (cube is fine)
- 1 small onion (chopped)
- 2 cloves garlic (minced)
- 2 tablespoons olive oil
- 375 millilitres milk
- 50 grams butter
- 450 grams plain flour
- 1 small handful fresh parsley
- 3 spring onions (green part only)
- salt to taste
- pepper to taste
To Fry
- 2 litres vegetable oil
- 250 millilitres milk
- 200 grams very fine breadcrumbs
- 1 large egg
To Make the Coxinhas
- 3 chicken breast cutlets
- 4 cups chicken broth (cube is fine)
- 1 small onion (chopped)
- 2 cloves garlic (minced)
- 2 tablespoons olive oil
- 1½ cups milk
- ¼ cup butter
- 3 cups all-purpose flour
- 1 small handful fresh parsley
- 3 scallions (green part only)
- salt to taste
- pepper to taste
To Fry
- 8 cups vegetable oil
- 1 cup milk
- 2 cups very fine breadcrumbs
- 1 large egg
Method
- Poach the chicken breasts in the chicken stock in a saucepan until cooked; this will take around 15 minutes, but do check they are cooked through. Remove from liquid and let cool.
- While the chicken is cooking, fry the chopped onion and garlic in the 2 tablespoons of olive oil for about 10 minutes, until soft.
- Remove some of the chicken stock, so that only 375ml / 1½ cups remains and then add the 375ml / 1½ cups milk along with the butter, and melt the butter in the liquid in the pan then slowly beat in the flour and cook just for a few minutes until the dough begins to come together and also come away from the sides of the pan as you stir. Turn the dough out onto a plate and leave until it's cool enough to handle comfortably.
- While you're waiting for the dough to cool, finely chop the chicken, parsley and spring onions, add the cooked onion and garlic, salt and pepper and mix. Leave this finely chopped mixture while you get on with the dough.
- Do not flour a surface, but simply knead the dough until it is smooth and bouncy (about 10 minutes), and then pinch off walnut sized lumps of dough, roll them into a ball and then flatten into discs with a slight lip at the edges: I think these resemble fine artichoke hearts.
- Take these rounds and add a scant teaspoon of chopped chicken and bring up the edges, all around, so that you have a ball, which you coax with your fingers into a bulbous pear shape. Place on a lined baking sheet and get on with the rest.
- Heat the oil over medium heat in a large saucepan. You need to start frying when the oil is about 180ºC/350ºF. You don't really need a cooking thermometer: simply add a tiny ball of dough and if it starts fizzling straight away, and rising goldenly to the top of the pan instantly, the oil is hot enough. But while you wait for it to heat up, dip the coxinhas.
- Beat the egg with the 125ml / ½ cup milk in one dish; tip the very fine breadcrumbs into another. Dip the coxinhas first into the egg mixture then into the sandy breadcrumbs, making sure they are well covered, then leave on a lined baking sheet.
- When the oil is hot enough, deep-fry the coxinhas, about 5 at a time, until they are gorgeously golden, in about 2 minutes' time. Remove to a baking sheet lined with kitchen paper.
- If you wish, you can keep your cooked coxhinas warm in a 120ºC/250ºF oven while you continue with the rest.
- Poach the chicken breasts in the chicken broth in a saucepan until cooked; this will take around 15 minutes, but do check they are cooked through. Remove from liquid and let cool.
- While the chicken is cooking, fry the chopped onion and garlic in the 2 tablespoons of olive oil for about 10 minutes, until soft.
- Remove some of the chicken broth, so that only 375ml / 1½ cups remains and then add the 375ml / 1½ cups milk along with the butter, and melt the butter in the liquid in the pan then slowly beat in the flour and cook just for a few minutes until the dough begins to come together and also come away from the sides of the pan as you stir. Turn the dough out onto a plate and leave until it's cool enough to handle comfortably.
- While you're waiting for the dough to cool, finely chop the chicken, parsley and scallions, add the cooked onion and garlic, salt and pepper and mix. Leave this finely chopped mixture while you get on with the dough.
- Do not flour a surface, but simply knead the dough until it is smooth and bouncy (about 10 minutes), and then pinch off walnut sized lumps of dough, roll them into a ball and then flatten into discs with a slight lip at the edges: I think these resemble fine artichoke hearts.
- Take these rounds and add a scant teaspoon of chopped chicken and bring up the edges, all around, so that you have a ball, which you coax with your fingers into a bulbous pear shape. Place on a lined baking sheet and get on with the rest.
- Heat the oil over medium heat in a large saucepan. You need to start frying when the oil is about 180ºC/350ºF. You don't really need a cooking thermometer: simply add a tiny ball of dough and if it starts fizzling straight away, and rising goldenly to the top of the pan instantly, the oil is hot enough. But while you wait for it to heat up, dip the coxinhas.
- Beat the egg with the 125ml / ½ cup milk in one dish; tip the very fine breadcrumbs into another. Dip the coxinhas first into the egg mixture then into the sandy breadcrumbs, making sure they are well covered, then leave on a lined baking sheet.
- When the oil is hot enough, deep-fry the coxinhas, about 5 at a time, until they are gorgeously golden, in about 2 minutes' time. Remove to a baking sheet lined with kitchen paper.
- If you wish, you can keep your cooked coxhinas warm in a 120ºC/250ºF oven while you continue with the rest.
Additional Information
MAKE AHEAD / STORE:
The coxinhas can be assembled up to 4 hours in advance. Refrigerate until ready to cook. Can also be assembled and frozen. Put the breadcrumb-coated coxinhas on a baking sheet lined with food wrap and freeze until solid, then transfer to a resealable bag and freeze for up to 3 months. Cook direct from frozen, allowing an extra 1-2 minutes of cooking time. Check that they are piping hot all of the way through before serving.


Tell us what you think
Thank you {% member.data['first-name'] %}.
Explore more recipesYour comment has been submitted.
What 7 Others have said
-
Posted by meg108 on 7th September 2022
-
Posted by Lisanix on 19th July 2019
-
Posted by Angela1610 on 10th November 2016
-
Posted by gregskorich on 20th May 2014
-
Posted by Victorgallo on 23rd March 2014
-
Posted by evanhien on 22nd March 2014
-
Posted by Maria Mizakami on 18th May 2013
Show more commentsWill enjoy making these for our next family party
Love it!!!! I'm from Brazil and I never cooked them, but now I live in Australia for 7 years and the only place I can get them are 80km away and pretty expensive. Now I can have a go and eat them anytime! Fingers crossed I cam make'em alright! Thank you for putting such a traditional and delicious Brazilian recipe!! And I also love all the tips below to master the coxinhas to the next level..!!
Sounds lovely, but my friend makes these for me and when cooking the chicken she also boils some potatoes. When they are cooked, take the chicken out, add some of the liquid and liquidized the potatoes into the chicken stock. Add the milk and butter, bring to a boil,simmer for 10 mins., then slowly add the flour. Keep mixing until all the flour is incoroprated and the dough is not sticky but nice and smooth this makes it have a creamier taste.
recipe was easy to follow and quite tasty. one issue i have and its my own is when you add the stock to make the dough you say remove stock until 1 and 1/2 cup remains. since there was roughly 4 cups i took this to mean i should use 2.5 cups for the dough which made it quite wet. next time i will know to use 1.5 cups for the dough. thank you for the great recipe
Mmmm, nhami nhami... This dish taste so good! I just love the way you describe all of your recipes... Best regards to everyone!
Coxinhas are not the size of a pear, they are the size of a coxinha (ha ha) and originally the coxinhas were made and a bone was stuck in it on the top to make it look more like a real coxinha. My grandmother used to make these and my cousin called them fried pears for obvious reasons. At parties you get the one bite (OK, two bites) coxinhas and other 'salgadinhos' and they are all delicious. I will try out your recipe (or Helio's) and I hope it will be as good as it looks!
Dear Nigella, whenever I make coxinhas, I use chicken thigh fillets instead of chicken breasts - as a result, the filling gets incredibly richer! Try this next time, sure you'll love it! Cheers!