
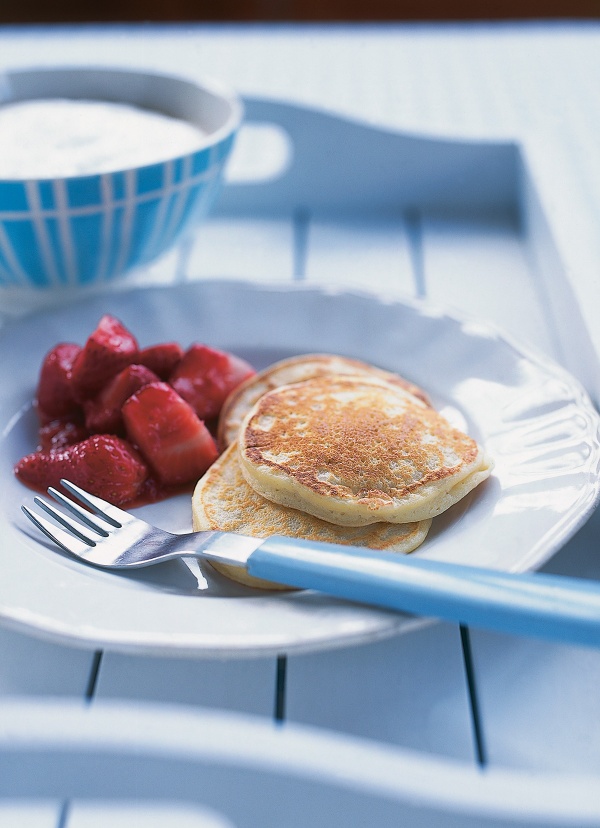
Yummy Scrummy Buttermilk Pancakes
A community recipe by Will_SNot tested or verified by Nigella.com
Introduction
The best American pancake recipe I have ever found curtesy of Scott Jenson - makes the lightest fluffiest tastiest breakfast ever!
The best American pancake recipe I have ever found curtesy of Scott Jenson - makes the lightest fluffiest tastiest breakfast ever!
Ingredients
Serves: 8 Pancakes, 2-3 dependi
- 350 millilitres buttermilk
- 1 egg
- 50 grams butter (melted)
- 10 millilitres vanilla extract
- 125 grams plain flour
- 40 grams caster sugar
- 3 grams bicarbonate of soda
- 2 grams baking powder
- 4 grams salt
- 12 fluid ounces buttermilk
- 1 egg
- 1¾ ounces butter (melted)
- fluid ounce vanilla extract
- 4⅖ ounces all-purpose flour
- 1⅖ ounces superfine sugar
- ⅛ ounce baking soda
- ounce baking powder
- ⅛ ounce salt
Method
Yummy Scrummy Buttermilk Pancakes is a community recipe submitted by Will_S and has not been tested by Nigella.com so we are not able to answer questions regarding this recipe.
Additional Information
Try adding blueberies or chocolate chips once you have added the batter to the pan, make sure they covered with batter before you flip the pancake and you have a yummy treat when you bite in!
Try adding blueberies or chocolate chips once you have added the batter to the pan, make sure they covered with batter before you flip the pancake and you have a yummy treat when you bite in!


Tell us what you think
Thank you {% member.data['first-name'] %}.
Explore more recipesYour comment has been submitted.
What 4 Others have said
-
Posted by Mamabutterfly on 22nd February 2015
-
Posted by Gympie on 25th October 2014
-
Posted by turmeric on 2nd February 2014
-
Posted by cesca-anna on 16th September 2012
Show more commentsThese are fantastic! I didn't need to add more flour but I did let the mixture rest for 2 mins before cooking and it really thickened up. Definitely worth a go!
OMG! These are great. Made them this morning and had warm apple pieces with maple syrup and a piece of bacon. My partner prefers the crepes, but was willing to try one, and another and yet another. Did not add extra flour, but used 10cm frying pan to get them started and contain them, then added to larger pan for the other side. Most definitely cooking these again.
I agree with the comment above. Just made them this morning for breakfast, and they are nice but you definitely need to add more flour as the batter is too runny as it is.
These were really good, but I needed to add extra flour because the batter was still quite runny! I'll be making them again though! :)