
Norwegian Pork Ribs
by Nigella. Featured in COOK EAT REPEATIntroduction
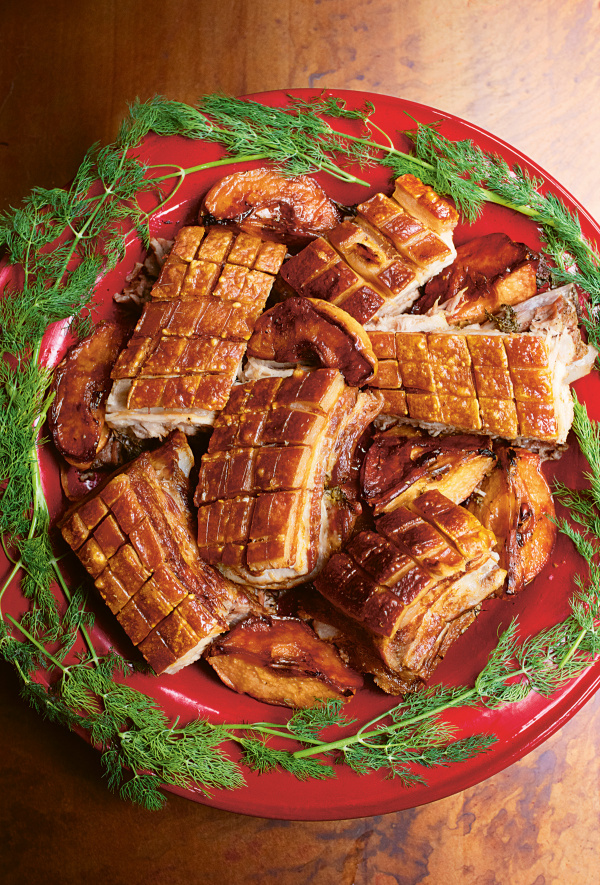
A vital part of the Christmas Eve dinner in Norway, these pork ribs have the tenderest meat and the crunchiest crackling imaginable. You have to take a leap of faith when making them, as the idea of letting the rind get so wet in the course of cooking goes against every bit of advice you may have heard thus far about the importance of keeping it dry. This method is an absolute revelation.
You need a big old slab of pork belly on the bone for this, which requires a visit to the butcher. And — this is essential — you will need to ask them to saw through the bones for you, as if about to divide the pork into three equal long strips, cutting through the bones and only a little way into the meat. What this gives you are a couple of narrow troughs, into which you press a paste of dill, garlic and juniper, which flavours the meat as it cooks, and which enable you, on serving, to cut the pork easily into chunky, crisp-topped, succulent slabs.
Peeking out between the ribs in this photograph are roast quinces. And to make these — should you be able to lay hands on quince in the first place — you simply cut the quinces into quarters (or eighths if they’re big) and roast these in olive oil (or, indeed, any fat you like) for about 30 minutes a side in a 200°C/180°C Fan/400°F oven. To make my cooking life easier, I like to roast these a day or so ahead of time, and then I just reheat them by popping them (on a baking sheet) on a shelf below the pork for the last 15 minutes of its final blast in the oven, leaving them in there, too, with the oven turned off, while I cut up the ribs.
Ingredients
Serves: 4-6 with leftovers
- 2½ - 3 kilograms bone-in and skin-on belly pork prepared as per instructions in recipe intro
- 3 fat cloves garlic
- 3 x 15ml tablespoons Maldon sea salt flakes (or 1½ tablespoons fine sea salt)
- 1 teaspoon juniper berries
- A large bunch fresh dill
- 2 onions
- 250 millilitres hot water from a just-boiled kettle
- 5½ - 6½ pounds bone-in and skin-on belly pork prepared as per instructions in recipe intro
- 3 fat cloves garlic
- 3 tablespoons kosher salt (or 1½ tablespoons fine sea salt)
- 1 teaspoon juniper berries
- A large bunch fresh dill
- 2 onions
- 1 cup hot water from a just-boiled kettle
Method
- You need to take the pork out of the fridge about an hour before you cook it so factor that into your timetable, adding it to the 3 hours, give or take, that the pork will be in the oven. For now, unwrap it and lay it rind-side down on a large chopping board.
- Peel the garlic cloves and drop them into the mortar part of a pestle and mortar, or into a bowl you can use with a stick blender. Add 2 tablespoons of the sea salt flakes (or 1 tablespoon of fine sea salt), the juniper berries and the stalks from your dill, and start either bashing, grinding and crushing or whizzing, as you prefer, until you have an aromatic green paste. It’s harder work with a pestle and mortar, but I adore making it this way: it makes my kitchen smell, rather invigoratingly, like a Nordic spa.
- Take this mixture over to the pork, and where the butcher has sawn through the bones, you will have two long troughs to tuck the paste into. Run a knife through them if you need to open up the cut area a little more. Press the mixture evenly between them.
- Push as many of the dill fronds into the paste as you can fit. Turn the pork rind side up. Rub the rind and sides of the pork with the remaining 1 tablespoon of sea salt flakes, (or 1½ teaspoons of fine sea salt).
- Get out a large roasting tin — I use one measuring 34 x 37 x 5cm / 13 x 15 x 2in. Peel the onions, then cut each of them into 3 thick slices; you need these as a flavour platform, to prop up the pork. One end must be slightly higher than the other, so that any liquid pours off and doesn’t pool on the rind, so place the pork, rind-side up, on the onions, arranging the slices as you feel best achieves that.
- Leave the pork in the tin for about 1 hour to lose its fridge chill and, when you’re not long off, heat the oven to 220℃/200℃ Fan/425°F.
- Pour the 250ml / 1 cup of just-boiled water into the roasting tin, cover the top tightly with foil, and cook in the hot oven for 45 minutes. It’s counter-intuitive, I know, but softening the rind now makes it crisp up unimaginably later.
- When it’s had its 45 minutes, take the pork out of the oven and remove the foil; the rind should have softened and puffed up a little. Use a large sharp knife to define the squares on the rind, cutting a little deeper into the original scoring marks. Or if you didn’t get it done by the butcher, do your own scoring at this point, cutting the softened rind into 2cm / ¾-in squares; it’s a curiously pleasant sensation.
- Turn the oven down to 170℃/150℃ Fan/325°F. Put the pork back into the oven without the foil, but make sure first that it’s still perched, one end higher than the other, on the slices of onion.
- Give the pork 2½ hours at this temperature, by which time much of the fat should have rendered down, melting lusciously into the meat, and less lusciously into the tin, and the rind will be beginning to crackle. But if, when you poke the tip of a knife into the pork, it doesn’t feel tender yet, leave it in for another 30 minutes.
- Turn the oven back up to 220℃/200℃ Fan/425°F, and give the pork around 15 minutes — or a little longer if needed, but keep watch to make sure the rind doesn’t go too far and burn — until the crackling is deep gold and crunchy, and some of the little squares may have popped up.
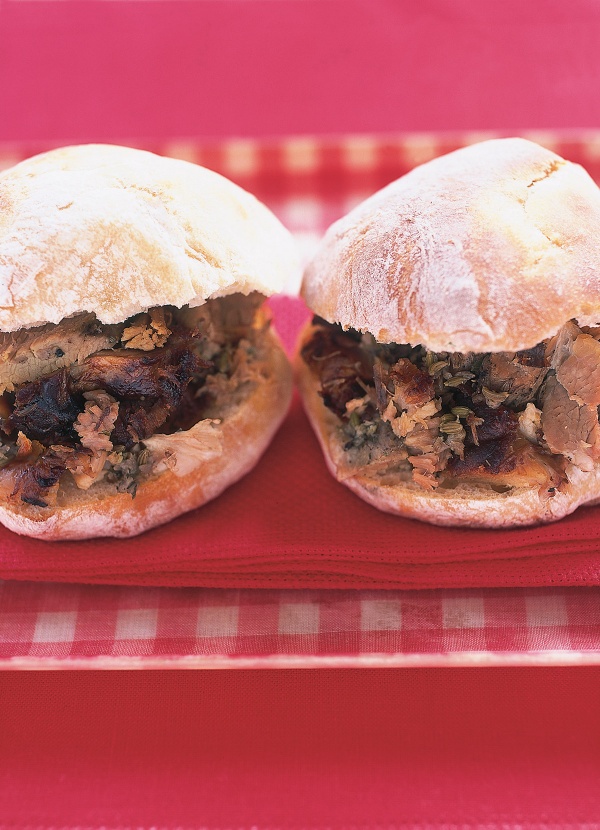
- Take the pork out of the oven and remove carefully to a carving board. Cut through both sides of each rib, down to where the butcher cut through the bones, to get a chunky rib section for each person. The crackling on the pork may make this tricky, so you can use poultry shears or kitchen scissors to cut through it — the splintering noise is rather splendid — before slicing down into the meat. This way each rib section gets a proper piece of crackling. Because the meat has to be so heavily salted to boost juiciness and flavour, most of the onions will be far too salty to serve. One or two will be perfect though, and divinely sticky with pork fat; you can share these out meagrely now, eat them yourself, or save them for sandwiches later.
- You need to take the pork out of the fridge about an hour before you cook it so factor that into your timetable, adding it to the 3 hours, give or take, that the pork will be in the oven. For now, unwrap it and lay it rind-side down on a large chopping board.
- Peel the garlic cloves and drop them into the mortar part of a pestle and mortar, or into a bowl you can use with a stick blender. Add 2 tablespoons of the sea salt flakes (or 1 tablespoon of fine sea salt), the juniper berries and the stalks from your dill, and start either bashing, grinding and crushing or whizzing, as you prefer, until you have an aromatic green paste. It’s harder work with a pestle and mortar, but I adore making it this way: it makes my kitchen smell, rather invigoratingly, like a Nordic spa.
- Take this mixture over to the pork, and where the butcher has sawn through the bones, you will have two long troughs to tuck the paste into. Run a knife through them if you need to open up the cut area a little more. Press the mixture evenly between them.
- Push as many of the dill fronds into the paste as you can fit. Turn the pork rind side up. Rub the rind and sides of the pork with the remaining 1 tablespoon of sea salt flakes, (or 1½ teaspoons of fine sea salt).
- Get out a large roasting tin — I use one measuring 34 x 37 x 5cm / 13 x 15 x 2in. Peel the onions, then cut each of them into 3 thick slices; you need these as a flavour platform, to prop up the pork. One end must be slightly higher than the other, so that any liquid pours off and doesn’t pool on the rind, so place the pork, rind-side up, on the onions, arranging the slices as you feel best achieves that.
- Leave the pork in the tin for about 1 hour to lose its fridge chill and, when you’re not long off, heat the oven to 220℃/200℃ Fan/425°F.
- Pour the 250ml / 1 cup of just-boiled water into the roasting tin, cover the top tightly with foil, and cook in the hot oven for 45 minutes. It’s counter-intuitive, I know, but softening the rind now makes it crisp up unimaginably later.
- When it’s had its 45 minutes, take the pork out of the oven and remove the foil; the rind should have softened and puffed up a little. Use a large sharp knife to define the squares on the rind, cutting a little deeper into the original scoring marks. Or if you didn’t get it done by the butcher, do your own scoring at this point, cutting the softened rind into 2cm / ¾-in squares; it’s a curiously pleasant sensation.
- Turn the oven down to 170℃/150℃ Fan/325°F. Put the pork back into the oven without the foil, but make sure first that it’s still perched, one end higher than the other, on the slices of onion.
- Give the pork 2½ hours at this temperature, by which time much of the fat should have rendered down, melting lusciously into the meat, and less lusciously into the tin, and the rind will be beginning to crackle. But if, when you poke the tip of a knife into the pork, it doesn’t feel tender yet, leave it in for another 30 minutes.
- Turn the oven back up to 220℃/200℃ Fan/425°F, and give the pork around 15 minutes — or a little longer if needed, but keep watch to make sure the rind doesn’t go too far and burn — until the crackling is deep gold and crunchy, and some of the little squares may have popped up.
- Take the pork out of the oven and remove carefully to a carving board. Cut through both sides of each rib, down to where the butcher cut through the bones, to get a chunky rib section for each person. The crackling on the pork may make this tricky, so you can use poultry shears or kitchen scissors to cut through it — the splintering noise is rather splendid — before slicing down into the meat. This way each rib section gets a proper piece of crackling. Because the meat has to be so heavily salted to boost juiciness and flavour, most of the onions will be far too salty to serve. One or two will be perfect though, and divinely sticky with pork fat; you can share these out meagrely now, eat them yourself, or save them for sandwiches later.
Additional Information
STORE:
Refrigerate leftovers, covered, for up to 3 days.
You can microwave a portion or so of the pork at a time, but I prefer to put a piece or two in a small tin, splash in some water, to which I may add some sake, soy sauce and chilli (sauce or flakes), then put in a fierce oven (220°C/200°C Fan/425°F), until the meat is piping hot all the way through (the liquid in the base of the tin will make sure it's tender and succulent) and the crackling will be crunchy. If you're reheating more than one portion in a proper oven, then I'd cover with foil for the first 10 minutes.


Tell us what you think
Thank you {% member.data['first-name'] %}.
Explore more recipesYour comment has been submitted.
What 2 Others have said
-
Posted by lucyhayward on 5th January 2022
-
Posted by IslayLuv on 1st February 2021
Show more commentsI have made this twice now.....absolutely delicious! It also works adding Asian flavours....but I accept this wasn't the intention of the recipe. Yum
In Norway it's common to precut the pork rind. Before the ribs go in the oven.